How to Train Yoko-Geri So It's More Than a Stiff Push: Building a Side Kick That Works Under Pressure
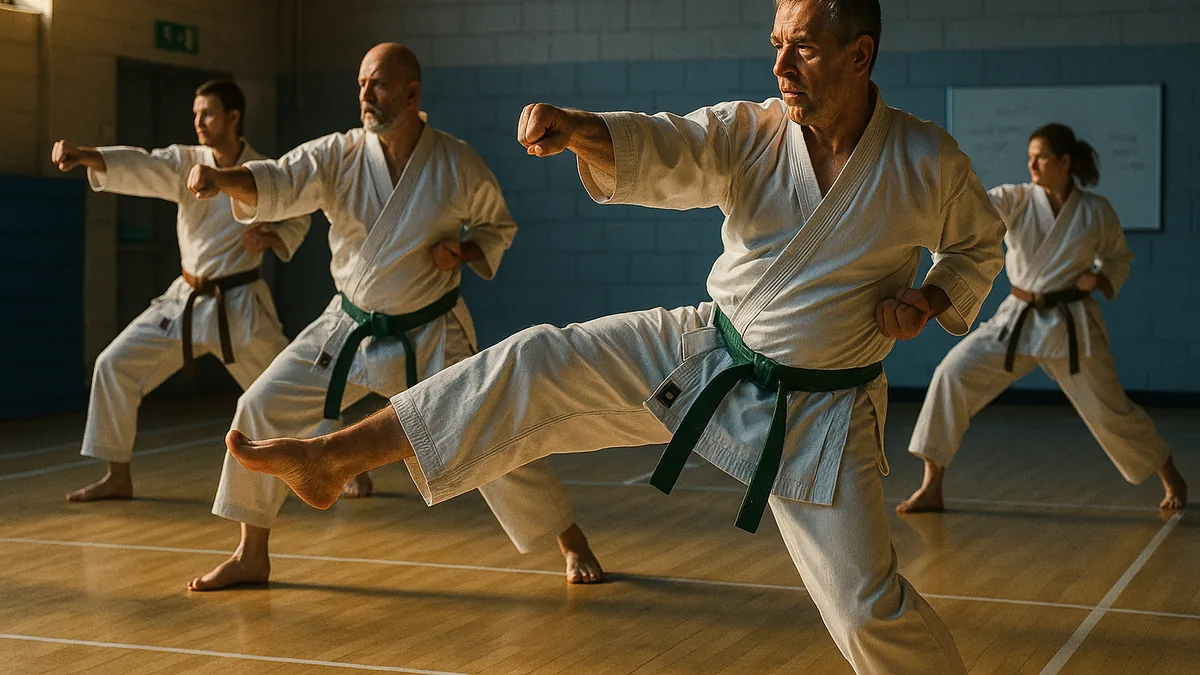
Most students treat yoko-geri like a push with a bent leg. They chamber, extend, and wonder why it doesn’t land with any real force. I’ve seen this pattern repeat itself across every belt level - white belts because they haven’t learned the mechanics yet, brown belts because they’ve learned the shape but not the engine underneath it.
The kick looks right. The chamber is there, the foot is bladed, the leg extends in the right direction. But when it makes contact, there’s no weight behind it. It’s a prod, not a kick. And in kumite, a prod at someone’s ribs doesn’t score, doesn’t stop anyone, and definitely doesn’t create the kind of pressure that makes your opponent rethink their approach.
The problem, almost every time, is that the hip isn’t driving the kick. It’s following it.
That distinction matters more than any other technical point I could make. Once you understand that the hip rotation is the kick - and the leg is just the delivery system - everything else starts to make sense.
Why Yoko-Geri Is Harder Than It Looks
My instructor used to say that yoko-geri is the most honest kick in karate. I didn’t understand what he meant until I started teaching. What he meant is that you can fake hip rotation in mae-geri and still get the kick out. You can muscle a mawashi-geri around with your quadriceps and it’ll still arrive. But yoko-geri, thrown without hip drive, arrives with almost nothing. The kick exposes exactly how much you’re actually using your hips.
The lateral direction of the kick means your hip has to rotate and tilt simultaneously, pushing the kicking side forward and slightly upward to align the hip behind the foot. That’s a more complex movement than the forward hip snap in mae-geri or the rotational drive of mawashi-geri. It takes longer to develop, and it requires specific drilling to groove properly.
Here’s what it should feel like when you get it right: the moment of extension, you feel your whole hip structure push through the target, not just your foot arriving at it. There’s a sensation of weight travelling through your body into the kick, like your centre of mass is briefly behind the strike. When that’s absent, you’re pushing. When it’s there, you’re kicking.
The Drills That Actually Build It
Hip-First Chamber Drill
This is the drill I use most with beginners, and I still come back to it myself when my yoko-geri feels flat. It isolates the hip movement so you can’t cheat it.
Why it matters: Most students chamber their knee first and then try to add hip rotation on the way out. The hip has to lead, not catch up.
Setup: Stand in a natural stance next to a wall, close enough to touch it with your shoulder. Face forward, target to your side.
Execution:
- Shift your weight onto the supporting leg and feel your hip settle over it
- Before you lift your knee, rotate and tilt your hip toward the target - the kicking side hip should push forward and slightly up
- Now chamber the knee - you’ll notice the knee naturally points more toward the target than it does when you chamber first
- Extend from that position, pushing through with the heel
- Hold the extended position for two seconds before retracting
What to feel for: The hip movement in step two should feel almost awkward at first - like you’re sticking your hip out to the side. That’s correct. If it feels natural and smooth, you’re probably not moving the hip far enough.
Common mistake: Students rush the chamber and skip the hip initiation entirely. They know intellectually that the hip should rotate, but in practice they lift the knee and then try to tilt the hip mid-extension. The correction that works is making them pause at the hip-set position before they do anything with the knee. Literally stop there, hold for one second, then chamber. It slows everything down enough that the sequence registers.
Wall-Supported Hip Tilt Drill
I’d put this second in terms of priority, but for students who struggle to feel the hip tilt at all, I’d actually start here.
Why it matters: The supporting hip has to drop slightly as the kicking hip rises. Students who miss this look like they’re leaning sideways rather than using their structure properly.
Setup: Stand sideways to a wall, supporting hand flat against it at shoulder height.
Execution:
- Use the wall to take some weight off the supporting leg without leaning your torso into it
- Slowly raise the kicking knee to chamber position
- Consciously drop the supporting hip and raise the kicking hip - exaggerate this
- Extend the kick slowly, holding the hip position throughout
- Retract in reverse order: foot in, hip settles, knee lowers
What to feel for: Your supporting side obliques should be working. If you feel nothing in that area, the hip isn’t dropping enough on the supporting side to allow the kicking hip to rise properly.
Common mistake: I’ve seen students use the wall as a crutch and lean their entire torso into it. The wall is for balance reference, not support. If you’re leaning, you’re hiding the problem instead of fixing it.
Resistance Band Extension Drill
This is where you start building power rather than just pattern. I prefer this over pad work for early-stage power development because the resistance is consistent and you can feel exactly where your force drops off.
Why it matters: Without resistance, students can complete the kick movement and feel like it’s working. Resistance exposes whether the hip is actually driving or the leg is doing the work alone.
Setup: Loop a resistance band around a fixed point at hip height. Stand sideways to the anchor point, band looped around your ankle or foot.
Execution:
- Set your stance so there’s light tension in the band before you begin
- Perform your full hip-set and chamber sequence
- Drive the extension against the band - focus on pushing from the hip, not pulling with the leg
- At full extension, hold for one second and feel where the tension is in your body
- Retract slowly and controlled against the resistance
What to feel for: You’ll feel the band resistance increase as you extend. If your hip is driving correctly, the resistance feels like it’s being pushed by your whole structure. If your hip drops out of the movement mid-extension, you’ll feel the resistance suddenly shift to just your hip flexors and quadriceps - a distinct, isolated burn rather than a full-body push.
Common mistake: Students rush the extension to “beat” the resistance. Slower is better here. The drill is about feeling where the drive comes from, not about completing the movement quickly.
Partner Resistance Drill
Once the mechanics are grooved in isolation, you need to train against unpredictable resistance. This is where the kick either holds up or falls apart.
Why it matters: A pad holder moves the pad to meet your kick. A partner pushing back against your extended kick is a completely different sensation. This is the closest drill to what actually happens in kumite when someone steps into your yoko-geri.
Setup: Training partner stands to your side, hands ready to push back against your foot at full extension.
Execution:
- Throw the kick to full extension
- Partner applies moderate resistance against your foot - not trying to collapse the kick, just creating pressure
- Your job is to maintain the extended position and feel your structure holding against the resistance
- Partner varies the timing and angle of resistance so you can’t anticipate it
- Retract cleanly even with resistance applied
What to feel for: When your structure is correct, the partner’s resistance travels back through your foot, through your hip, and into your supporting leg. You feel stable. When the hip alignment is off, the resistance collapses your knee or pushes you off balance - the force has nowhere to go.
The Follow-Through Problem
I’ve noticed that students who’ve drilled the chamber and extension correctly often lose the kick right at the moment of contact because they start retracting before the hip has finished its push. The kick arrives, but it arrives without the last 20 percent of its potential force because the hip is already reversing.
Think of it like a punch. If you start pulling your fist back the moment it touches the target, you’re not hitting through the target, you’re touching it. The same applies here. The hip needs to complete its push before the retraction begins.
What I tell students is to imagine the target is six inches further away than it actually is. Kick through the near surface to the far surface. It sounds like a mental trick, and it is - but it changes the physical outcome because it delays the retraction by just enough to let the hip complete its drive.
Variations That Build Adaptability
Once the basic mechanics are solid, the kick needs to work from different positions and with different timing. The two variations I prioritise are the yoko-geri kekomi from a forward stance and the stepping yoko-geri.
The forward-stance variation forces you to find the hip rotation from a position that doesn’t naturally set you up for it. It’s harder, and it’s worth doing because in jiyu-kumite, you rarely get to set up perfectly sideways before you kick.
The stepping yoko-geri - stepping across with the rear foot before kicking - adds range and disguises the kick’s origin. I’d recommend drilling this only after the static version is reliable, because the added movement gives students an excuse to skip the hip initiation. The step creates momentum that can mask poor hip mechanics until you hit resistance, and then it falls apart.
For students working on oi-zuki combinations, yoko-geri as a counter off a failed lunge punch is genuinely effective. Your opponent’s weight is committed forward, you’re already in motion, and a properly driven yoko-geri to the midsection stops them cold. But it only works if the kick has real weight behind it - otherwise you’re just pushing someone who’s already moving toward you.
Community Perspective
There’s a genuine disagreement in karate circles about how much hip tilt is correct in yoko-geri, and it mostly comes down to style and application.
Traditional Shotokan practitioners often emphasise a more upright supporting leg and a relatively restrained hip tilt, prioritising structure and control. Practitioners from styles with more competition focus sometimes advocate for a more aggressive hip drive that sacrifices some structure for penetration. Kyokushin-influenced training tends to develop a very powerful kekomi through heavy bag and resistance work that naturally produces a different hip movement than kata-focused training.
I think the honest answer is that the “right” amount of hip tilt depends on what you’re trying to do with the kick. For stopping power at close range, the aggressive hip drive wins. For maintaining position and balance in a flowing exchange, the more conservative version has advantages. What I’d push back on is the idea that you should pick one and never explore the other. Train both. Know what you’re choosing and why.
The other debate worth acknowledging is whether yoko-geri is actually useful in modern kumite. I’ve heard senior practitioners argue it’s too slow and too telegraphic to work against a good opponent. I’ve also seen it land cleanly in competition when set up correctly - usually as a counter, rarely as an opener. It’s not your highest-percentage technique in free sparring, but dismissing it entirely means you’ve lost a tool that works in specific situations. The same is true of a lot of techniques that get written off because they require more setup than a jab or a roundhouse.
Key Takeaways
- The hip drives the kick - the leg delivers it. If you’re not feeling your hip push through at the moment of contact, you’re pushing, not kicking.
- Drill the hip-set as a separate movement before the chamber. Most students skip this step because it feels slow. It’s the most important step.
- Resistance training exposes the truth about your mechanics. If the kick collapses under pressure, the hip isn’t aligned behind it.
- Follow-through means letting the hip complete its push before retracting. Pulling back early is the single most common reason a technically correct kick lands without impact.
- Variations matter, but only after the static version is reliable. Adding movement to broken mechanics just hides the problem.
- If you want to understand why your blocking needs the same structural thinking your kicks do, the principles in why your uke isn’t working apply directly - structure and alignment under pressure are the same problem, different technique.
The weekly digest
New karate articles, once a week
One email every week with everything new on Karate Lifestyle. No spam; unsubscribe in one click.
We'll email you to confirm. See our privacy policy.