Target Pads for Karate: How to Choose, Use, and Get the Most Out of Them in Solo and Partner Drilling
Most people buy target pads the same way they buy a gi bag or a pair of training shoes - they grab whatever’s cheapest on the shelf, use it for six months, then wonder why their partner’s wrist hurts and the pad has split at the seam. I’ve seen this cycle repeat itself across every dojo I’ve trained in. The pad ends up in the corner of the equipment cupboard, slightly warped, smelling like old foam, and nobody touches it.
That’s a shame, because a decent set of target pads will do more for your striking development than almost any other piece of solo or partner equipment. The problem isn’t that people don’t care - it’s that nobody tells them what to actually look for before they buy.
What You’re Actually Buying a Pad For
Before you look at a single product, get clear on how you’re going to use it. This sounds obvious but most people skip it entirely, and it’s the reason they end up with the wrong pad.
There are three genuinely different use cases here, and they each pull you toward a different type of pad:
- Solo drilling - you’re holding the pad yourself, usually working on combinations, timing your own strikes, or drilling a specific technique in isolation
- Partner drilling - one person holds, one person strikes, and you’re building feedback into the session
- Pad work for conditioning - higher volume, harder contact, longer rounds
I’ve trained with practitioners who bought focus mitts designed for boxing and then complained they couldn’t get clean feedback on their gyaku-zuki. I’ve also seen people buy thick Thai-style pads for light partner work and end up with dead, muffled contact that tells them nothing about their technique. The pad shapes what you feel, and what you feel shapes how you develop.
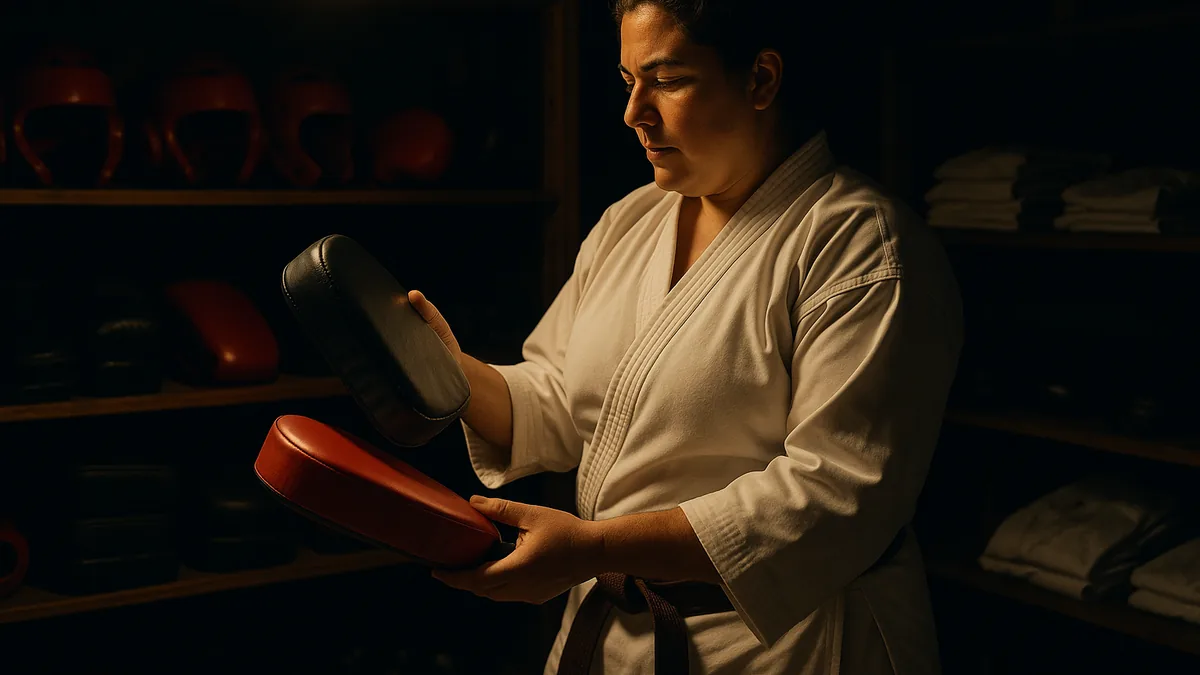
For karate-specific work, I’d steer most people toward a flat target pad - sometimes called a clapper pad or strike pad - over curved mitts. The flat surface gives you honest feedback. When your technique is clean, the snap is clean. When it’s not, you feel it immediately. There’s no curve to compensate for a slightly off-angle strike the way a curved mitt can.
Materials: What Lasts and What Doesn’t
I’ve gone through a lot of pads over fifteen years, and the honest truth is that the outer material matters less than most people think - it’s the foam density and the stitching that determine whether a pad lasts two years or two months.
Vinyl pads are cheap and easy to wipe down, but they crack along the edges with regular use, especially in colder training environments. Leather pads cost more upfront but hold their shape significantly better over time. If you’re training three or four times a week with a partner, the leather option pays for itself.
What I tell students when they ask about materials is this: squeeze the pad before you buy it. It should feel firm but not rigid. If it compresses easily under light pressure, it’ll bottom out fast under real striking force. You’ll feel the impact transferring straight into your partner’s wrist, which is uncomfortable for them and teaches you nothing about your technique. If it barely compresses at all, it’s too dense and you’ll be working against the pad rather than into it.
The stitching around the handle is where budget pads fail first. I’ve noticed that most cheap pads use a single row of stitching around the grip loop, and after a few hundred rounds of hard work it starts to pull away. Look for double-stitched handles and reinforced edging. It sounds like a minor detail until your partner’s grip fails mid-drill and the pad goes flying.
Size and Weight: Match It to Where You Are, Not Where You Want to Be
One mistake I see often with newer students is buying pads that are too large because they assume bigger means more forgiving. It actually means the opposite. A pad that’s too large for your current technique lets you get away with imprecise targeting. You land somewhere on the surface and it registers as a hit, even if your alignment was off.
I used to think bigger pads were better for solo drilling because there was more surface area to work with. My instructor corrected this early on. He had me work a small rectangular pad - about 30cm by 20cm - and suddenly every technique that wasn’t properly aligned missed the target or felt wrong on impact. That session changed how I thought about pad work entirely. The pad isn’t just a target, it’s a diagnostic tool.
For most adult karate practitioners working at kyu level, a mid-sized flat pad - roughly 30-35cm in the longest dimension - is the right starting point. It’s large enough to drill combinations without constantly resetting your aim, but small enough to demand precision.
Weight matters more for solo work than partner work. If you’re holding a pad in one hand and striking with the other, you want something light enough that your holding arm doesn’t fatigue before your striking arm does. Anything over 400-500g starts to create compensation in your holding shoulder, which introduces bad habits into the drill without you realising it.
Solo Drilling With Pads: What Actually Works
Holding your own pad and drilling solo is underrated. I’ve done entire thirty-minute sessions with a single flat pad, working on timing, combination flow, and the transition between techniques. You get immediate tactile feedback on every strike without needing a partner.
The setup that works best for me is holding the pad at a fixed height and angle, then drilling the same technique twenty to thirty times before changing anything. The goal isn’t to feel good - it’s to notice when something feels different. A clean gyaku-zuki into a firm pad has a specific sensation: the contact is sharp, the recoil is controlled, and you feel the energy transfer up through your knuckles and into your shoulder. When the technique is off, the pad either moves too much or the contact feels dull and spread out rather than focused.
What doesn’t work is moving the pad constantly to simulate a moving target. That’s partner work. Solo pad drilling is about isolating a single technique and building honest feedback into your own movement. If you’re constantly adjusting the pad, you’re not drilling - you’re just hitting something.
If you’re also working on breaking technique, there’s useful overlap between pad work and what you’d do with a breaking board. The principles of penetration and focus are the same. You can read more about that in our piece on breaking boards for karate.
Partner Drilling: The Holder Matters as Much as the Striker
Most of the bad pad work I’ve seen in dojos isn’t caused by the striker - it’s caused by the holder. A passive holder who just stands there with the pad at chest height is giving their partner almost nothing to work with. The feedback is flat, the angles are wrong, and the session teaches neither person very much.
What I tell students who are holding pads is that your job is active, not passive. You’re presenting a target at the right angle for the technique, absorbing the strike with your whole body rather than just your arm, and giving honest feedback after each exchange. If your partner’s technique is clean, the pad makes a sharp, focused sound. If it’s not, you feel the difference in your wrist and forearm. Say something.
The angle of presentation is where I see the most consistent errors. For a mid-level gyaku-zuki, the pad should be angled slightly inward - not flat-on like a wall. This replicates the actual surface you’d be striking in application and teaches your partner to drive through the target rather than into it. When the pad is perfectly flat, it invites a pushing strike rather than a penetrating one. You’ll feel the difference immediately: a pushing strike moves the pad back; a penetrating strike makes it snap.
For combination work, the holder needs to reset quickly and present the next target at the right height and angle before the striker is ready to throw. If the holder is slow, the striker learns to pause between techniques. That pause will show up in kumite when you least want it.
Community Perspective
There’s a genuine split in the karate community about whether pad work belongs in traditional training at all. Some instructors - particularly those from more classical Shotokan or Goju-ryu backgrounds - see pads as a concession to sport training, something that softens the precision demanded by kihon and kata. Their argument is that if you’re drilling correctly, you don’t need external feedback from a pad - you develop internal sensitivity through repetition.
I have some sympathy for this view. I’ve trained under instructors who never used a single pad in their entire curriculum and produced technically excellent karateka. There’s something to the idea that relying on external feedback can become a crutch.
But I’ve also seen what happens when students never get real contact feedback until they’re thrown into kumite. The gap between what they think their technique looks like and what it actually does is enormous. Pad work - used correctly - closes that gap faster than almost anything else.
My position is that pads are a tool, not a training philosophy. Use them deliberately, with clear goals for each session, and they’ll accelerate your development. Use them mindlessly - hitting the same flat pad the same way for the same twenty minutes every week - and you’re just burning calories.
This debate about which equipment actually improves technique is worth thinking about beyond just pads. If you’re building out your training kit, it’s worth reading our honest take on the makiwara as well - the arguments overlap in interesting ways.
Practical Buying Checklist
When you’re standing in front of a rack of pads or browsing online, here’s what I’d actually check before committing:
- Foam density: firm under moderate pressure, not soft, not rigid
- Stitching: double-stitched handle, reinforced edges
- Size: 30-35cm for most adult practitioners at kyu level
- Weight: under 500g for solo work, slightly heavier is fine for partner drilling
- Outer material: leather if budget allows, vinyl if not - just accept the shorter lifespan
- Handle fit: your partner’s hand should fit comfortably without the grip loop being too wide or too tight
If you’re buying pads as part of a broader kit build, think about how everything works together. A well-fitted gi, the right bag, and quality protective gear all affect how you train. Our karate bag buyer’s guide covers what to look for if you’re at the point of putting together a full training kit.
Key Takeaways
- Match the pad to the drill, not the other way around. Flat target pads suit karate-specific technique better than curved mitts. Buy for the training you’re actually doing.
- The foam density is the most important feature. A pad that bottoms out under impact teaches you nothing and risks injuring your partner’s wrist. Squeeze it before you buy.
- Smaller pads demand more precision. If you’re getting away with sloppy technique because the target is huge, the pad is hiding your problems rather than fixing them.
- The holder is half the drill. Passive holding produces passive striking. Present the target at the correct angle, absorb properly, and give feedback after each exchange.
- Solo pad work is underused. Thirty minutes of focused solo drilling with a single flat pad will expose technical gaps that partner work often masks.
- Buy quality once. Budget pads fail at the handle stitching and foam compression within months of regular use. A mid-range leather pad from a reputable supplier will outlast three cheap ones.
The weekly digest
New karate articles, once a week
One email every week with everything new on Karate Lifestyle. No spam; unsubscribe in one click.
We'll email you to confirm. See our privacy policy.